If you have long hair, or have a child with long hair, the urge to plait it is almost irresistible. It’s a very satisfying activity, it keeps the hair tidy and out of the way, and it looks nice. But have you ever looked at pictures of fancy plaits, or seen other people wearing plaits that are more complicated than you can manage, and wondered how it works?
You’re not alone!
I had long hair throughout my teens and twenties, and mastered basic plaits. I could just about handle a French plait, but only for special occasions, and if I had enough time to take three attempts at it.
Now I have a daughter with long hair, who loves to have it played with and plaited. She has also seen people with hairdos that she’d like, and asked me for them.
I know my French plaiting ability has improved since I used to do my own – being able to see what I’m attempting helps considerably – but I’d not consider myself a maestro, by any means. So, when Maria mentioned, in passing, that she could do a plaiting workshop, I was all over it!
Therefore, one sunny Saturday I packed myself, my daughter and my husband (who is also quite nifty with hairdos, and might turn out to be better at this than me) down to Maria’s, to play plaiting.
Maria began by explaining that once you know how to plait, any plait is actually quite straight forward. She demonstrated this by creating a crown, more or less, on my daughter’s head, simply winding a French plait around and around, until all the hair was incorporated, and the whole head was covered. Very impressive.
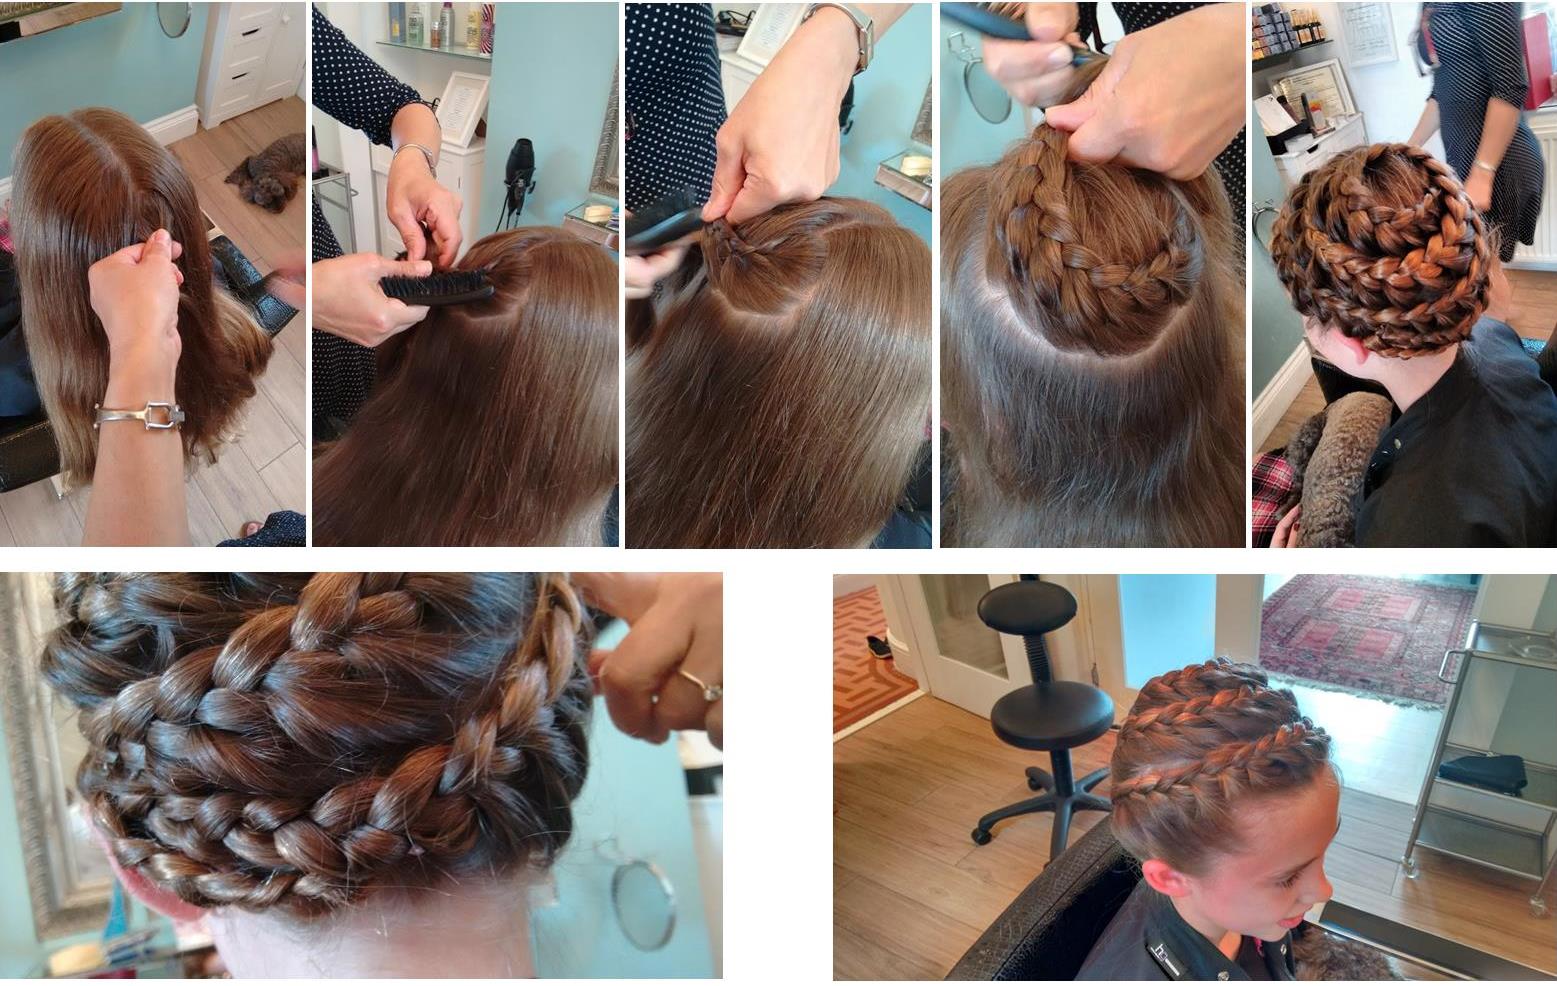
First off, you need to brush the hair. Really brush it, until it’s not even slightly tangled. You’ll need to keep brushing it at intervals, so employing the person whose hair you are plaiting as your assistant, to hold brushes, and sometimes strands of hair, is very useful!
We then looked at feather and waterfall plaits. These are the sort that look very elegant, and are actually very straightforward to create.
The trick is to keep very careful track of where each strand has come from, and where it’s going, and it does take practice to get this sorted out in your head. Both of these are plaits that allow strands to fall away from the plait, not continuing to include them as you go down. One has a firm braid at the top edge, and the other a more feathered appearance, and both are very elegant.
With a waterfall plait, you take the hair in from the top, losing the hair from the bottom, and then collecting a new strand from the bottom. Effectively, hair strands fall straight through, in a straight line, if you’re getting it right.
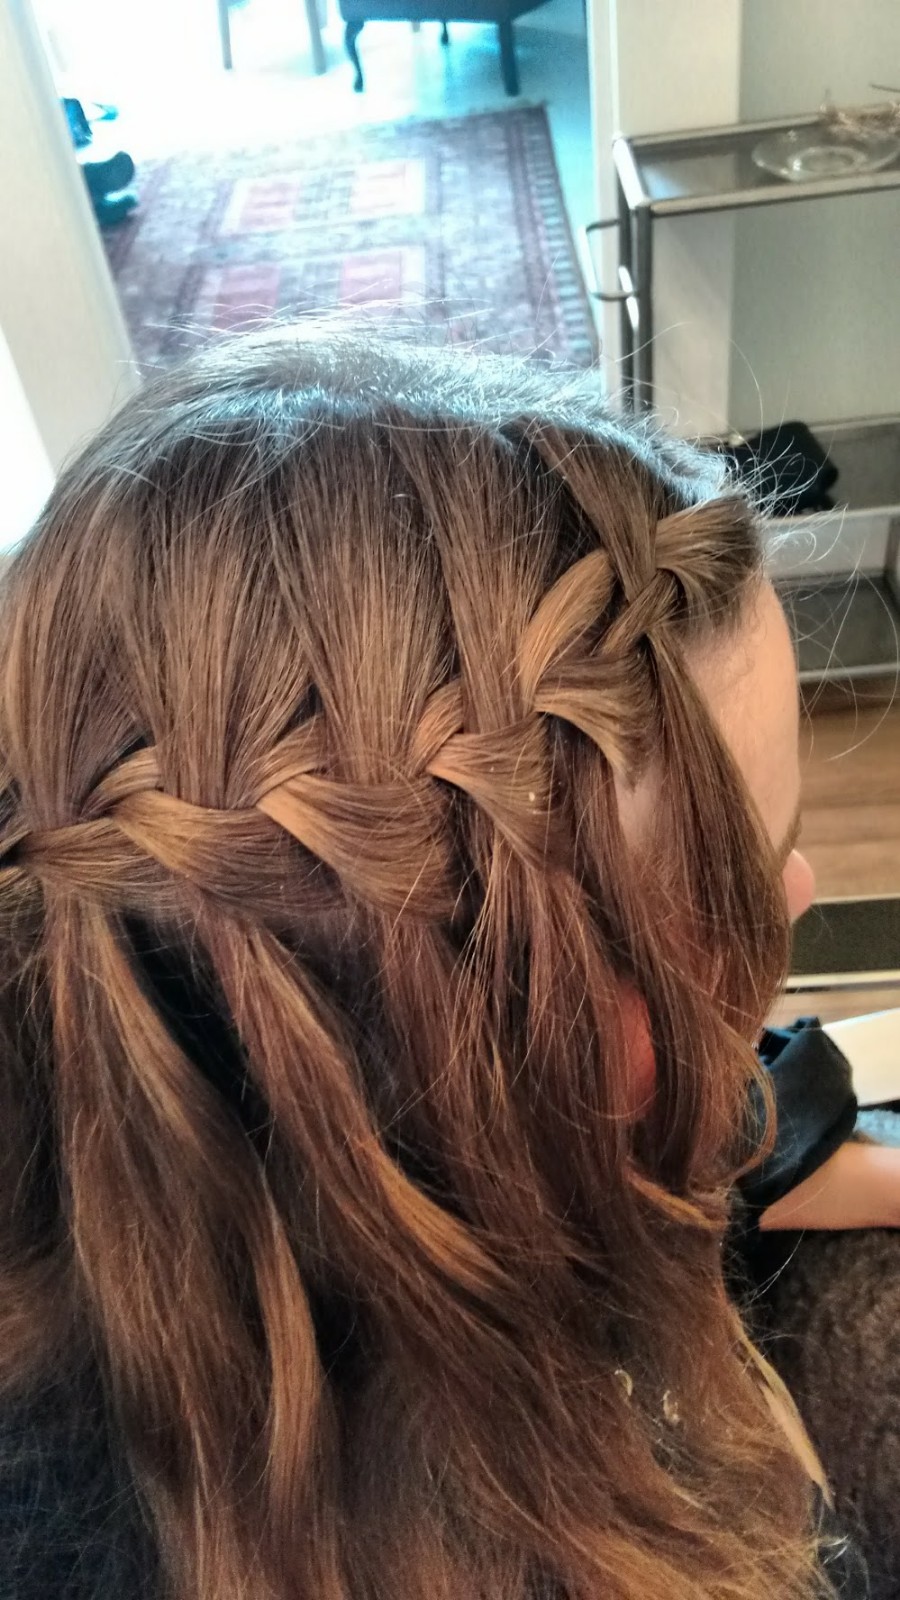
The difference with a feather plait is that you only collect hair from underneath, while still losing strands below. This gives a clean upper edge, where a waterfall has a French-plait look to the upper edge.

Both are very smart for an evening!
We also looked at Dutch plaits. These are similar to French plaits, but where a French plait draws the incoming strands over the top of the plait, a Dutch plait draws it in underneath, allowing the finished plait to stand proud of the back of the head.
If you’re used to doing French plaits, learning to do a Dutch plait is a little like turning your brain inside out, but now that I have got to grips with it, I find them easy to manage. They are also more stable and robust than a French plait, as the hair is caught in sooner, so a Dutch plait will last longer than a French one against the trials of a school day!
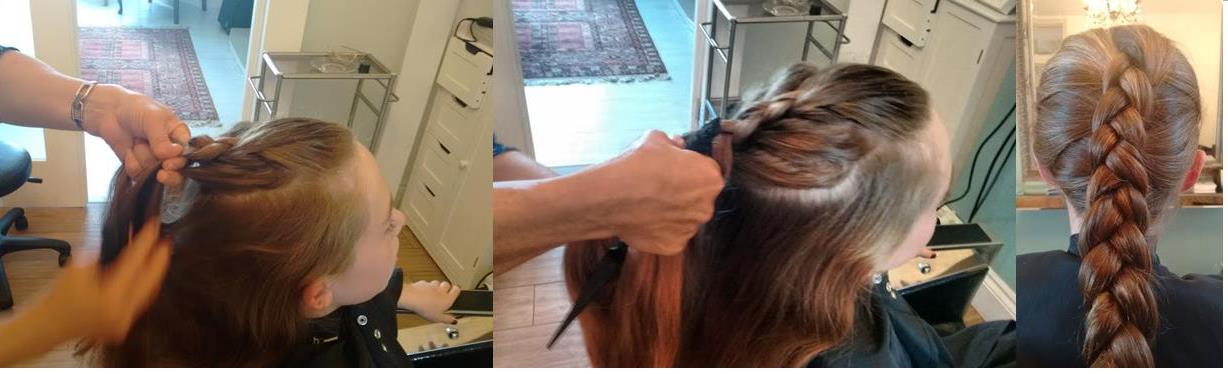
The complete plait on the right is my own attempt!
A fishtail plait is something that is very impressive to look at, and not that technical to create. They look tidier with a band at the top, but can be created without. The secret is to use very small strands of hair, lifting from the back of the bundle on alternate sides, but they take a lot longer to make than regular plaits, for this reason.
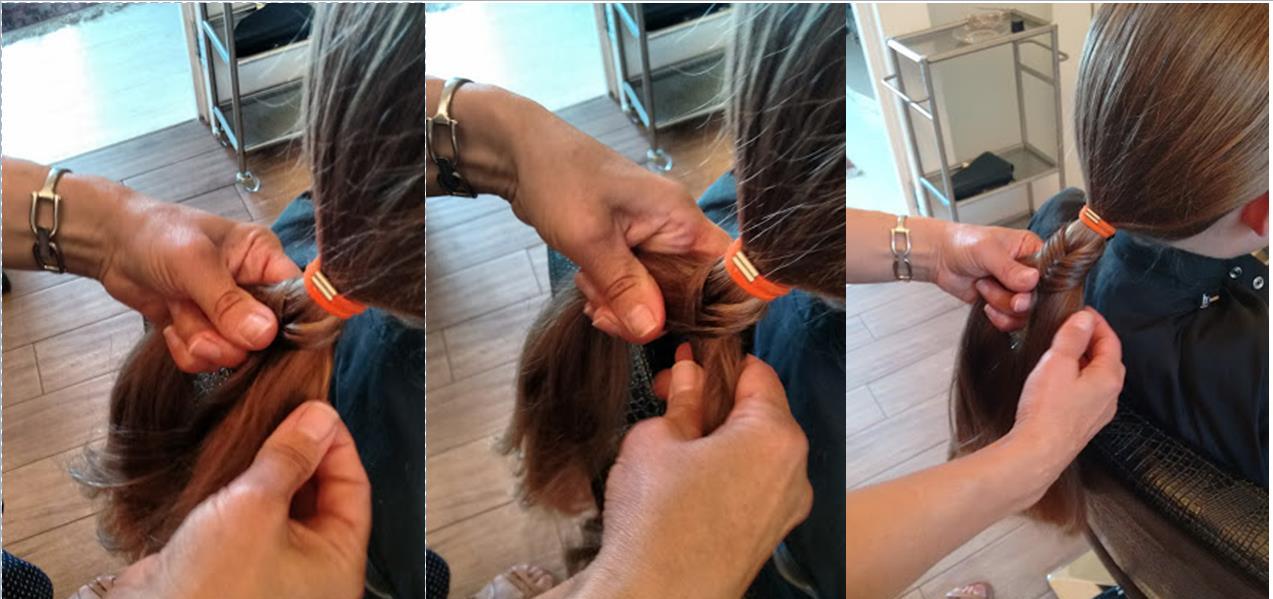
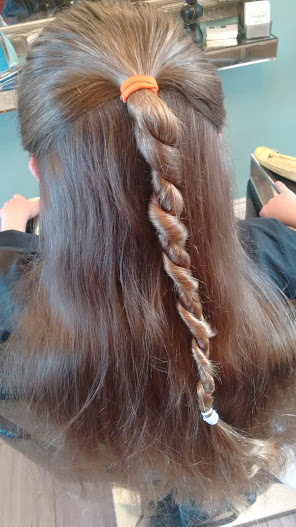
Twists are a bit of a dark art… and I must say that I haven’t really got to grips with them (which is OK as my daughter prefers plaits to twists). Twisting the hair against the direction you think, is the secret here, as it will just unravel if you twist it and put a band on the end.
Once we’d finished looking at twists, Maria took requests. Isabel asked about ladder plaits, as she’d seen pictures on the internet. A ladder plait is what happens when a waterfall or feather plait is paired with another. Maria demonstrated with a waterfall above, and a feather below, to give a crisp edge at the bottom. The first plait is created with the strands falling from the plait, as before, and then a second plait is started, taking in those hanging strands, and others, to create a ladder effect. It is truly impressive.

Since the workshop, Isabel has been to school with Dutch plaits on numerous occasions, and has had a waterfall plait for a school disco, as well as to play with. She’s also been playing at fishtail plaits with her own friends, and teaching them what Maria taught me – though I’ve not a clue how she can do that, having been underneath at the time!